

We are proud to announce the launch of SciCan OPTIM OS1 Liquid to round out our new line of OPTIM OS1 broad-spectrum, hospital-grade cleaner-disinfectant products.
OPTIM OS1 is a one-step, cleaner-disinfectant that removes soil and hard-to-kill organisms from clinical contact surfaces. It’s proprietary LAS Active System formulation kills bacteria, viruses, TB bacteria, and emerging pathogens in just 1 minute.
Rapid contact times for best results
- 60-second kill times for viruses, bacteria, and yeast
- Kills TB Bacteria in only 45 seconds and Candida auris in 60 seconds
Safe for use on hard, non-porous clinical surfaces
- Cleans and disinfects stainless steel, anodized aluminum, non-porous upholstery, Corian countertops, silicone, and more
Formulated with the user in mind
- VOC-free, fragrance-free and dye-free
Emerging Pathogen Claim ensures your clinic is ready for the next viral
threat
- Qualifies for EPA’s Emerging Viral Pathogen Claim
- Kills SARS-CoV-2, the virus that causes COVID-19, in only 30 seconds
You can learn more about OPTIM’s newest formula below

OPTIM OS1 Wipes Quick Reference Guide
Consult the product label before using this surface disinfectant.
OPTIM OS1 SOLUTION Liquid Spray

Spray Ready-to-Use OPTIM OS1 liquid onto a SciCan Dry Towelette. Do not directly spray onto the surface.

If surface is not heavily soiled, clean and disinfect surface with one wipe and allow surface to remain wet for the contact time indicated on the label.

If surface is visibly soiled, clean surface with one
towelette and discard. Use a second towelette to disinfect and allow surface to remain wet for the contact time indicated on the label.
OPTIM OS1 Ready-to-Use Wipes

Pull out OPTIM OS1 towelette at a 45 degree angle. Close lid.
If surface is not heavily soiled, clean and disinfect surface with one wipe and allow surface to remain wet for the contact time indicated on the label.
If surface is visibly soiled, clean surface with one towelette and discard. Use a second towelette to disinfect and allow surface to remain wet for the contact time indicated on the label.
IMPORTANT !
DO NOT allow OPTIM OS1 to pool on surfaces.
Use of gauze dipped in solutions for wiping may cause pooling and should be wiped dry.
FOR BEST RESULTS:
- Do not over apply OPTIM OS1
- Use of OPTIM OS1 on brass, copper, and clear acrylic could discolor or damage surfaces, if not used as directed and over applied.
- Dental Association guidelines recommend the use of utility gloves when cleaning and disinfecting surfaces.
PLEASE REFER TO THE ORIGINAL CONTAINER FOR COMPLETE DIRECTIONS AND ADDITIONAL INFORMATION.
Procedure for disinfecting PVS elastomeric impression materials with OPTIM OS1
- Once the impression is taken, rinse it well under running tap water to remove blood and saliva.
- After rinsing, gently shake the impression within the sink basin to remove any adherent water with minimal splatter.
- Spray the entire impression with OPTIM OS1. Use the contact times as stated on the label.
- Rinse the impression thoroughly with tap water to remove any excess disinfectant. After a thorough rinse, gently
shake the impression inside the sink basin to remove any adherent water with minimal splatter. - Once dry, place the disinfected impression in a sealed bag.
The impression is now safe and ready for further processing.

Switching to OPTIM OS1
- Give all surfaces a good cleaning with soap and water before switching to OPTIM OS1.
- After switching to OPTIM OS1, surfaces should to be periodically rinsed with water (recommended no less than once per week).
- Common practice for all chemical disinfectants is to periodically rinse and dry surfaces to maintain the surface integrity.
- Avoid mixing of chemistries.


SURGICAL Instrument cassette organizers
Tray Dimensions: 1.5" x 2.7" x 0.75"
*SIX of the MINI surgical plastic sterilization trays fit the STATIM 2000 Sterilization cassette.
Convenient for jewelry and instrument sterilization for multiple procedure setup and aseptic transport inside the closed STATIM cassette.
I use two small trays per cassette or mix with the micro trays to fit three in each sterilization program. — Brian Skellie

Organized
They keep your equipment organized and avoid condensation for fast drying. Two or more fit per Statim 2000 cassette, making them perfect for efficiency in a high volume studio environment.
- They can be processed unwrapped for immediate use or processed wrapped for storage and later use.
- Jewelry, needles and more, can be securely tucked between the silicone nib fingers.
- The silicone nib mat can be removed or cut to your preferred shape to allow for more space or different organizational options.

Reduced waste
We have an idea that doesn't involve blue paper
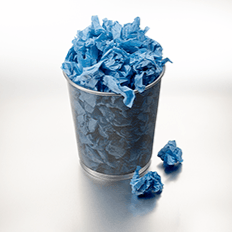
Our trays can be used to work out of the Statim Cassette, and directly on a work surface such as a Mayo stand without the need for sterile drape, CSR wrap, or a dental bib.
- Instruments are returned to the tray, then the whole tray is processed in the HYDRIM on a heavy duty cycle or in an ultrasonic for at least 20 minutes.
- The processed surgical trays can then be sterilized in the Statim either unwrapped for immediate reuse or sub-sterile storage, or wrapped for sterile storage.
Plastic sterilization tray with clear amber top with silicone nib mats for delicate equipment, for better steam penetration and faster drying of equipment for procedures
![STATIM 5000 Sterilization Cassette [parts available separately]](https://i0.wp.com/d2j6dbq0eux0bg.cloudfront.net/images/226067/621365598.jpg?resize=500%2C364&quality=89&ssl=1 "STATIM 5000 Sterilization Cassette [parts available separately]")


![STATIM 2000 Sterilization Cassette [parts available separately]](https://i0.wp.com/d2j6dbq0eux0bg.cloudfront.net/images/226067/products/3901917/620818195.jpg?resize=500%2C394&quality=89&ssl=1 "STATIM 2000 Sterilization Cassette [parts available separately]")
![STATIM 2000 Sterilization Cassette [parts available separately]](https://i0.wp.com/d2j6dbq0eux0bg.cloudfront.net/images/226067/products/3901917/2948853950.jpg?resize=600%2C280&quality=89&ssl=1)


